Renovating an Old Building into a Modern Retail Store with AI
Use ReRender AI Home and Nano Banana 2 to redesign an old building as a modern retail storefront, with prompts for materials, glazing, signage, and lighting.
An older building can have the right scale and street presence for a retail store while its exterior still feels closed, dated, or difficult to read. A renovation concept needs to answer a practical question: how can the facade become more welcoming and commercially recognizable while the building remains recognizably itself?
This tutorial uses ReRender AI Home with Nano Banana 2 to develop that concept from an existing exterior photograph. The workflow combines an uploaded image with written instructions about what to preserve and what to redesign. It is useful for architects testing an early direction, designers comparing finishes, and retail owners explaining a brief.
This worked example starts with an AI-created image of a fictional older building. The renovation images were generated in ReRender AI Home using Nano Banana 2. They illustrate a design process, not a documented construction project. Adapt the prompts to the building in your own photograph.
Renovation goal: a modern storefront within the existing shell
Imagine a small, two-story building becoming a contemporary lifestyle retail store called FORM. The ground floor should communicate an open shop through clear display glazing, a recognizable entrance, restrained signage, and warm lighting. The upper floor should look refreshed without losing its original window rhythm.
Keep the building height, roofline, overall width, corner edges, upper-floor openings, and ground-floor structural piers. Redesign the surface finishes, window frames, glazing, door treatment, signboard, and light fixtures. This gives the renovation a clear boundary: the commercial identity changes while the underlying architectural form remains mostly intact.
Starting image: read the existing building first
For this example, we prepared a photorealistic AI image of an older two-story building with a simple parapet roof, weathered painted plaster, four upper-floor windows, and two broad ground-floor display openings flanking a central doorway. The blank, weathered fascia, opaque window coverings, and bulky frames make the shopfront appear inactive.
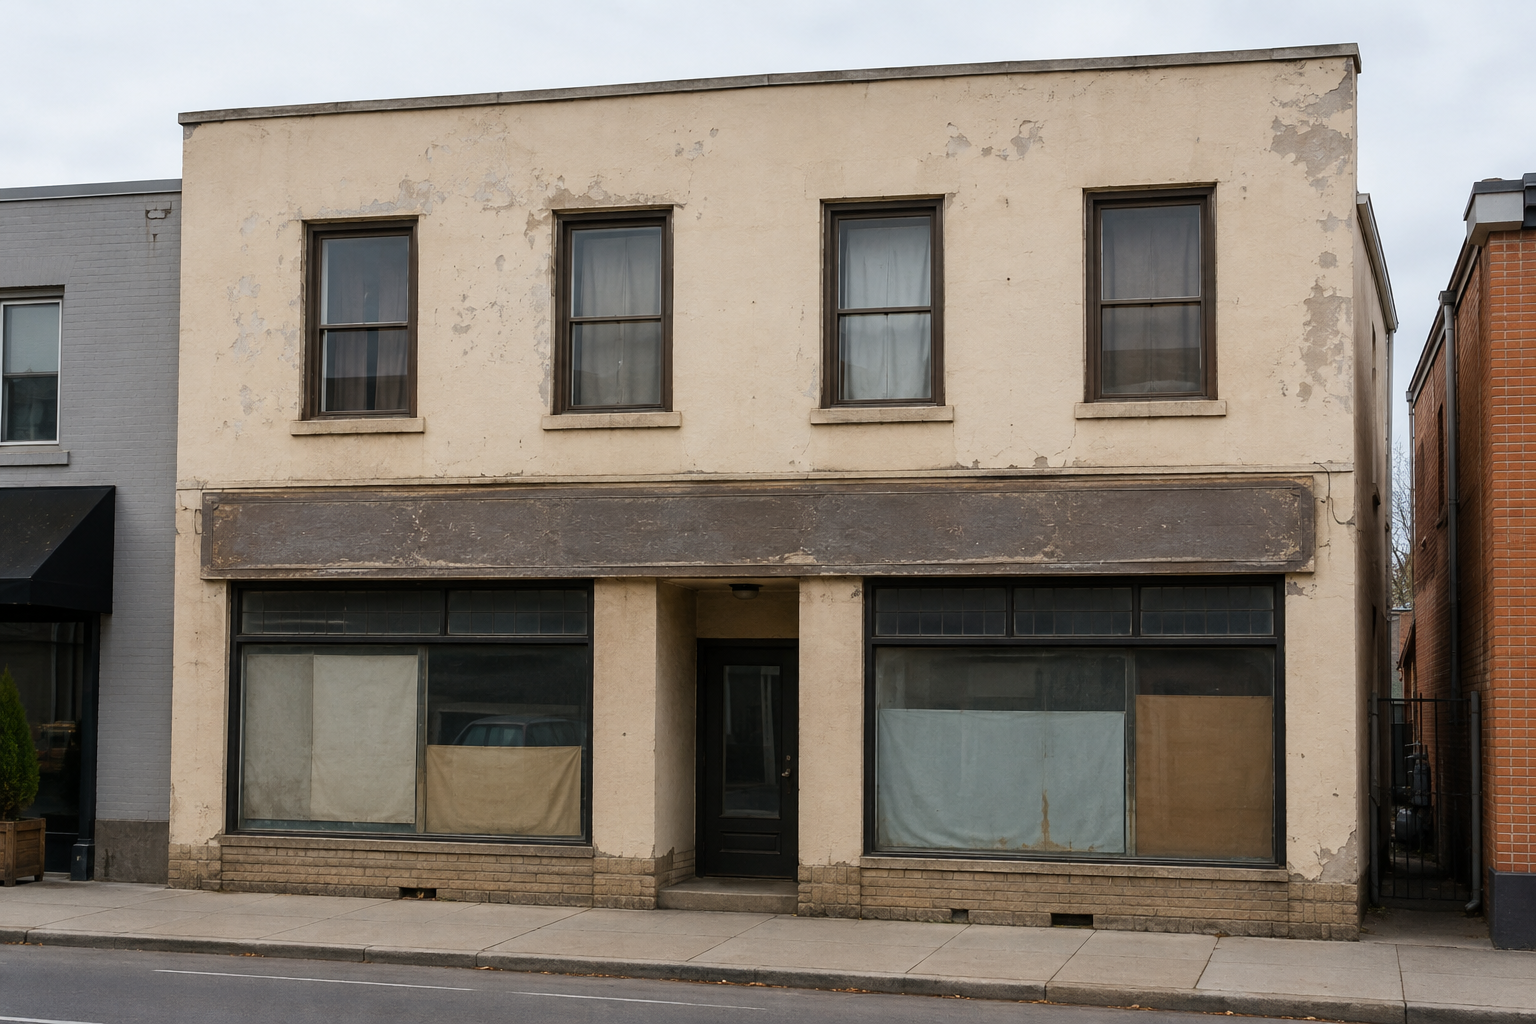
Starting image — AI-created fictional building prepared for this tutorial. This is the source uploaded to ReRender AI, not a photograph of a real property.
Use a photo you own or have permission to use. A front or modest three-quarter view works well because it reveals the facade layout and entrance depth. Include the whole roofline, both building edges, and the pavement at the door. Avoid a crop that hides the base of the building or a parked vehicle that conceals the storefront.
Before uploading, write down the features that make this building identifiable. In this scenario, those are the two-story silhouette, straight parapet, upper window spacing, three ground-floor openings, and masonry piers between them. Your photograph may have a different arrangement; change the prompt accordingly. Do not ask for a central entrance if the existing doorway is on the left and must stay there.
The starting condition: a recognizable building with tired finishes and weak retail visibility. The intended transformation: the same shell with a coordinated facade, transparent shop windows, a clear entrance, and a legible store identity.
Step 1: open Home and upload the building photo
Sign in to ReRender AI and choose Home in the navigation. At the top of the signed-in page, the prompt area says “Rendering is easier with ReRender” and “Upload up to four images or start from text.”
Click Upload Image and select your existing-building photograph. For the first renovation pass, use one image to keep the architectural reference unambiguous. Check that the correct image is attached before rendering. In this example, the uploaded image set the ratio to 3:2; confirm that value before rendering. Use a PNG or JPEG for this demonstrated workflow.
Although Home can start from text, this task begins with an image: the photograph supplies the existing shape, openings, viewpoint, and surroundings. The prompt supplies the renovation brief. A text-only description would not give the model the same specific building to work from.
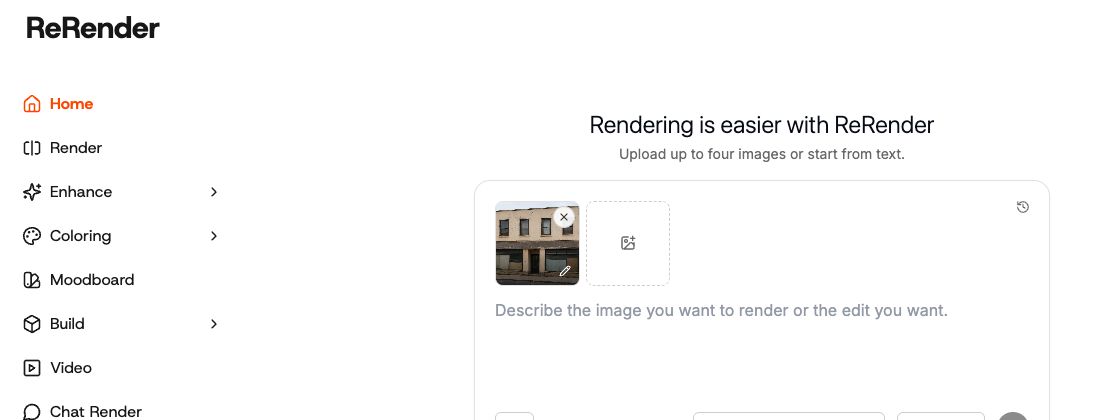
Home input — the old-building image is attached as one of four possible references. Check the thumbnail, Nano Banana 2 label, and 3:2 ratio before writing the renovation brief.
Step 2: select Nano Banana 2 and set the proportions
Open the model selector beneath the prompt field and choose Nano Banana 2. Check the selected label before each new pass. The current selector also lists Nano Banana and GPT Image 2; this tutorial uses Nano Banana 2 throughout.
Next, open the aspect-ratio menu beside the model selector. Choose a ratio close to your source photograph, such as 4:3 or 3:2 for a landscape exterior. Home also offers 1:1, 16:9, and other proportions. A matching ratio makes before-and-after comparison easier; a wider output is not automatically a better renovation image.
Keep the same ratio while comparing design alternatives. If you also change the framing or viewpoint, it becomes harder to tell whether the architecture has stayed consistent.
Step 3: describe the renovation in the prompt field
The Home prompt field invites you to describe the image you want to render or the edit you want. Write the brief in three parts: preserve the architecture, specify the changes, and describe the presentation.
Use this first-pass prompt for a photograph matching the example:
Transform the old building in the uploaded photograph into a modern lifestyle retail storefront named FORM. Treat this as an exterior renovation of the same building. Preserve the two-story massing, total building height and width, straight parapet roofline, building corners, upper-floor window positions and sizes, ground-floor masonry piers, and all existing door and window opening boundaries. Keep the same camera position, perspective, framing, neighboring buildings, and pavement geometry.
Refresh the weathered upper facade with warm off-white mineral plaster. Finish the ground-floor wall surfaces and piers with light beige limestone panels, with restrained joints aligned to the existing facade. Replace the old frames within the two existing display openings with slim dark bronze metal frames and clear glass. Remove opaque window coverings and show a simple, softly lit retail display behind the glazing. Replace the door within the existing central doorway with a clear glazed entrance and a slim dark bronze frame, keeping its position and opening size unchanged.
Replace the faded sign with one understated dark bronze fascia within the existing signboard area above the ground-floor openings. Add the short word FORM in simple, evenly spaced light-colored letters. Add small, discreet warm light fixtures beneath the fascia and a gentle interior glow. Keep the pavement and entrance clear. Create a believable contemporary commercial appearance with realistic material texture and subtle glass reflections, photographed in soft natural daylight. Do not add floors, change the roof, merge openings, remove structural piers, or extend the building.
The location words matter. “Limestone on the ground-floor piers” is more precise than “use luxury materials.” Likewise, “replace frames within existing openings” makes the intended scope clearer than “add large windows.”
These are instructions to the model, not a guaranteed geometry lock. You still need to compare the generated image with the original.
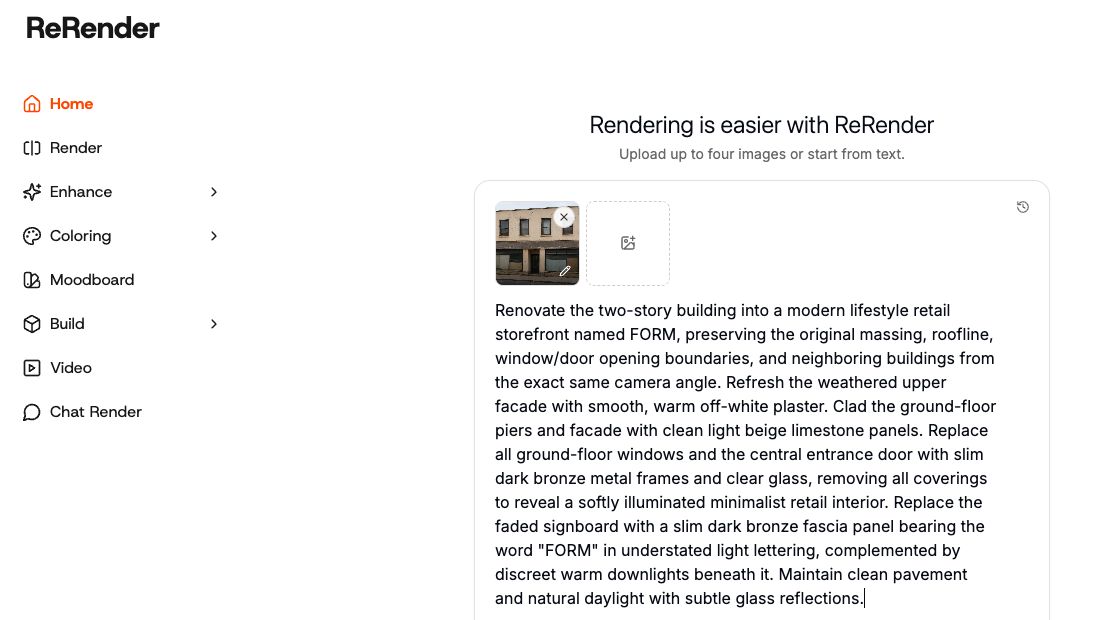
Generation setup — this compact version of the brief keeps the same preservation requirements and material direction as the expanded example above. The arrow button submits the render.
Step 4: render and check the architecture before the styling
Once the image, prompt, model, and aspect ratio are ready, click Render. Review the generated image against your original photograph. Home includes My Renders, and the navigation includes History for revisiting previous work.
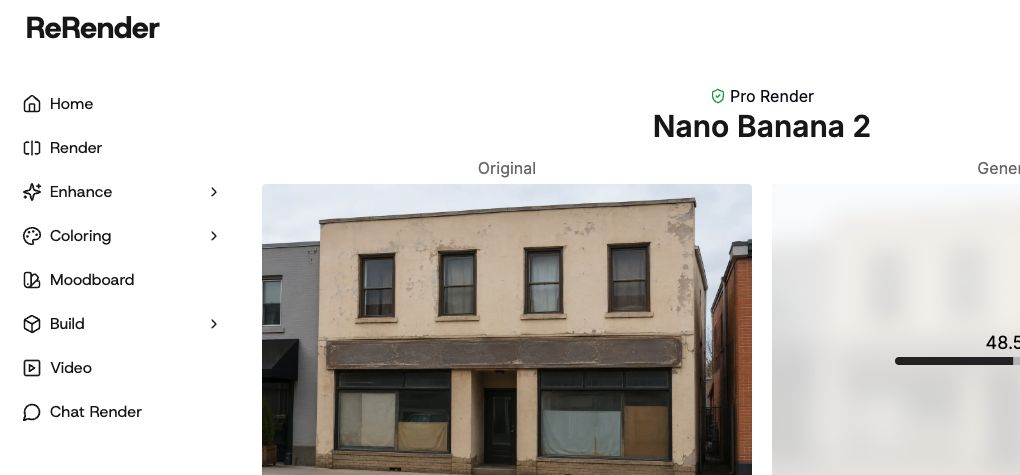
Rendering in progress — after submitting from Home, ReRender opens a Nano Banana 2 result page with the input under Original and progress under Generated. This screenshot was captured during an additional run of the same renovation brief; outputs can vary between runs.
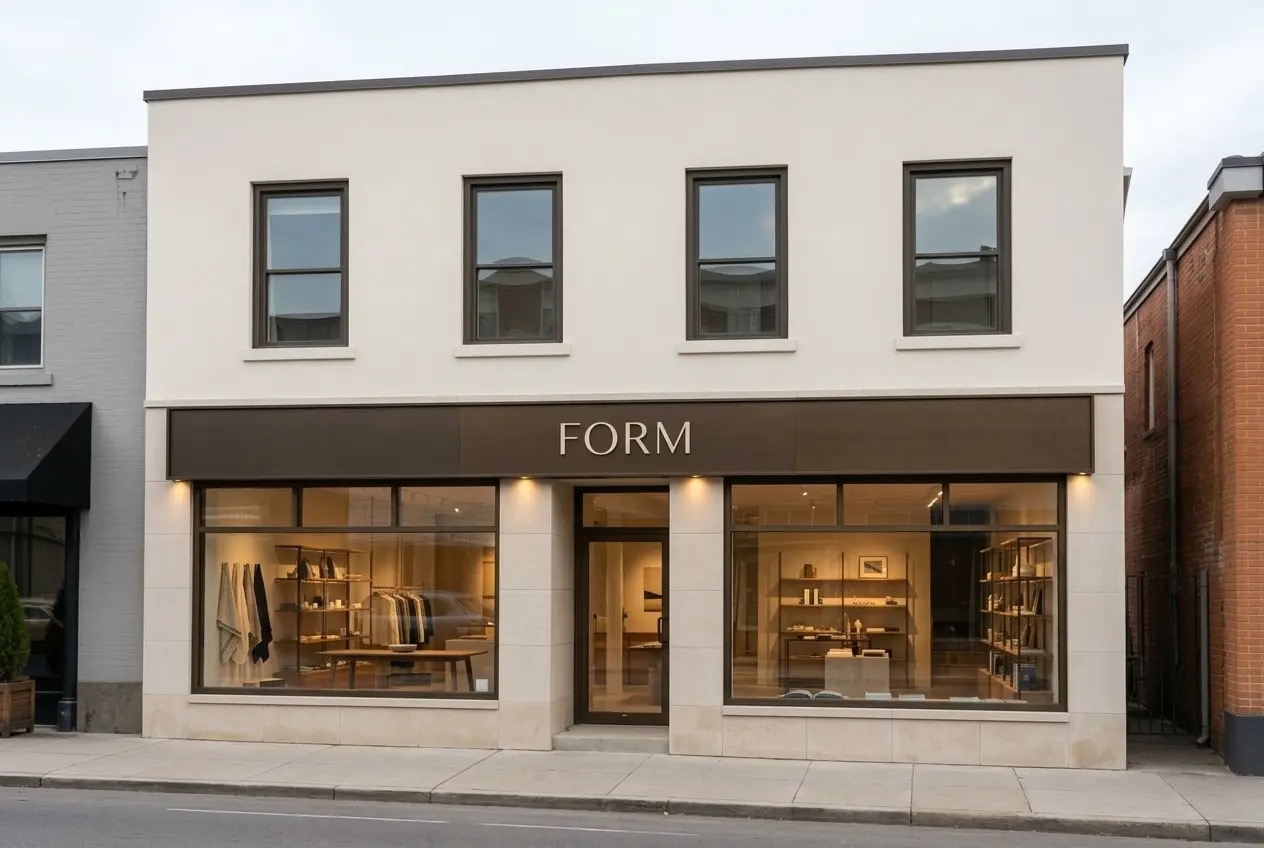
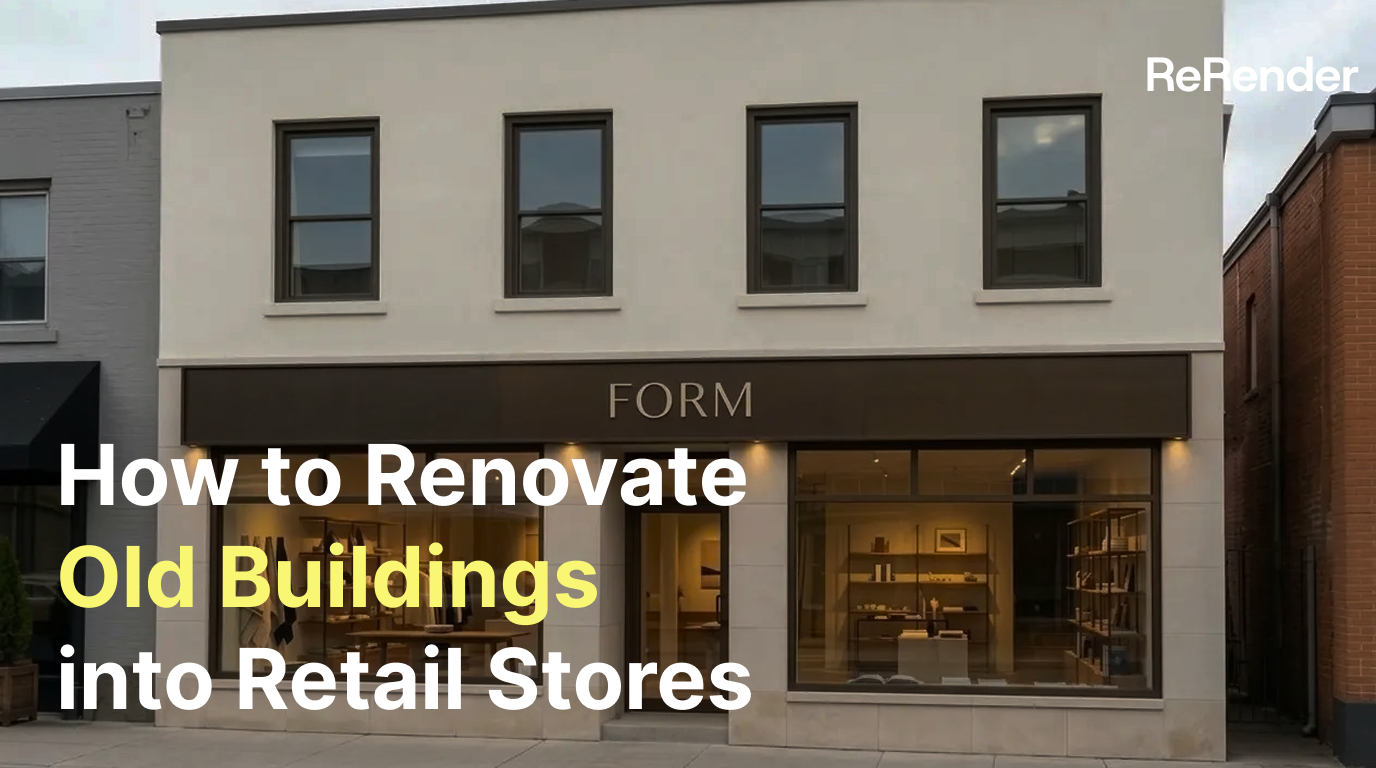
First pass — generated in ReRender AI Home with Nano Banana 2 using the starting image and the full renovation prompt above. The main silhouette, four upper windows, two display openings, and central entrance remain recognizable. The glazing and warm interior make the retail use clear.
Start with the features that were meant to stay fixed:
- Does the roofline have the same profile and height?
- Are the building edges and overall proportions still aligned with the photograph?
- Are upper-floor windows in the same positions, with the same spacing?
- Are the ground-floor piers still present, and are the original opening boundaries intact?
- Is the entrance still in the correct place, with a believable relationship to the pavement?
Then assess the retail design. The sign should be readable without dominating the facade. Display windows should reveal enough interior activity to suggest a shop, while the entrance should remain easy to locate. Check that stone joints, metal frames, and light fixtures have plausible scale.
An attractive image that adds a floor or removes a pier does not meet this renovation brief. Correct those changes before refining the atmosphere.
Step 5: refine one design decision at a time
For a controlled comparison, return to Home, upload the original photograph again, keep Nano Banana 2 and the same aspect ratio selected, and revise the full prompt. Keep the preservation instructions in every version.
To refine a concept you already like, use a saved copy of that generated image as the next uploaded image. In that case, the new input becomes the visual reference for the next pass. Continue checking against the original building photo, because small geometric changes can accumulate across repeated edits.
The following are focused prompts for use with an uploaded concept image. If you return to the original photograph instead, incorporate the relevant change into the full renovation prompt above.
Material alternative: quieter and more economical in appearance
Keep the architecture, all opening boundaries, entrance position, sign size, camera view, and lighting exactly as shown in the uploaded concept. Replace only the light beige limestone on the ground-floor wall surfaces and piers with fine-textured warm gray mineral render. Keep the off-white upper facade and dark bronze storefront frames. Use a matte finish with subtle natural variation. Do not change any geometry or add decorative elements.
This tests a visual alternative; the rendering itself does not establish material cost, durability, or a construction specification.
Storefront refinement: improve visibility
Preserve the entire building geometry, facade materials, signboard, doorway, and window opening sizes in the uploaded concept. Reduce the strength of the reflections in the two ground-floor display windows so a restrained retail display is visible behind the glass. Keep the glazing believable, with subtle street reflections and visible slim frames. Keep the entrance unobstructed. Do not enlarge or merge the openings.
Signage refinement: reduce visual clutter
Keep the building, materials, glazing, lighting, and camera unchanged. Refine only the fascia sign above the ground-floor openings. Use one short word, FORM, centered in simple light-colored uppercase letters on the existing dark bronze sign panel. Keep generous empty space around the letters. Remove additional text and logos. Do not increase the panel height or cover any upper-floor windows.
Inspect lettering closely. If text remains distorted, request a blank fascia for the concept and add precise brand artwork separately when preparing the presentation.
Lighting study: assess the evening identity
Preserve the uploaded storefront design, geometry, opening sizes, materials, sign, and viewpoint. Change only the time of day to early evening. Add a restrained warm glow from the retail interior and soft illumination beneath the existing fascia. Keep the sign readable, glazing transparent, and material textures visible. Avoid overexposed light strips, excessive bloom, and new light fixtures elsewhere on the building.
Develop the daylight version first so you can judge the facade clearly. Treat the evening image as a separate lighting study rather than mixing a lighting change into every material comparison.
Tips for preserving the original architecture
Name the fixed features explicitly. “Preserve the structure” is useful but broad. List the roof profile, floor count, corners, piers, opening positions, and viewpoint that matter in your image.
Separate openings from their infill. You can request new glazing, frames, and doors within existing openings while keeping the surrounding wall geometry. Asking for floor-to-ceiling glass across the whole facade may conflict with retaining its piers and sill levels.
Keep the brief internally consistent. If your source has small windows and you ask to preserve every opening, the result should retain small windows. A proposal to enlarge them belongs in a separately identified option with a different renovation scope.
Return to the original when the form drifts. Simplify the design request and reinforce the specific feature that changed. A new pass from the original photograph is often a clearer comparison than repeatedly editing an image that has already lost the intended proportions.
Tips for facade materials and commercial design
Limit the first scheme to a small palette: one main wall finish, one ground-floor accent, and one frame or signage metal. Give each material a location, color, texture, and finish. This makes alternatives easier to compare and avoids a facade where every surface competes for attention.
Design the sign, window frames, and entrance as a coordinated composition. Keep signage within the available fascia area, align panel joints with existing architectural lines, and use lighting to support the doorway and displays. Avoid adding planters or promotional objects where they obscure the entrance or conceal geometry you need to assess.
Final result: the same building with a new retail identity
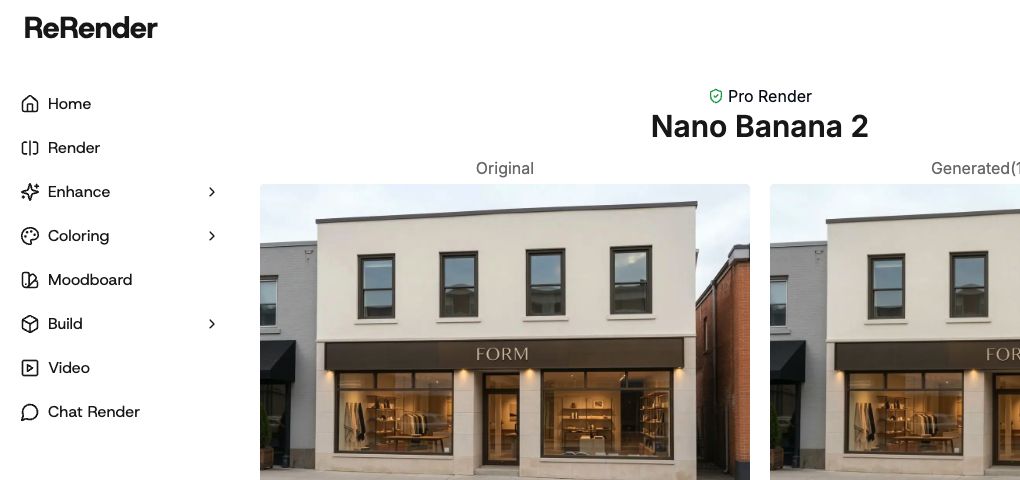
Refinement result — Original on this screen is the first renovation render uploaded for the next pass, not the weathered building photograph. Generated shows the selected refined output at 1264 × 848. Use the download button beneath the generated image to save it, and compare it with the initial building image before finalizing your concept.
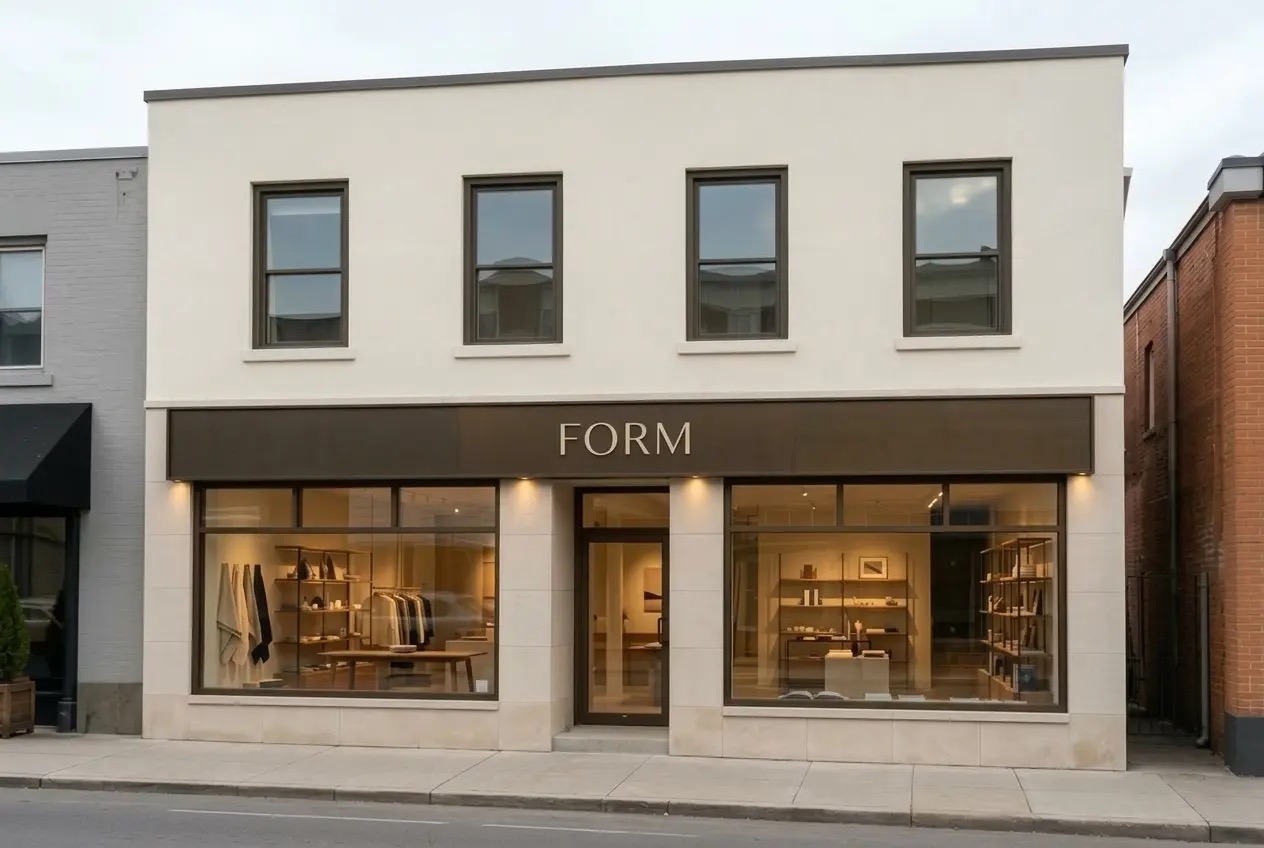
Final daylight refinement — the first result was uploaded to Home and processed with Nano Banana 2 using the storefront-visibility prompt. The adjustment is subtle; the facade palette and overall composition stay consistent. This selected result also serves as the article cover.
The selected final concept retains the recognizable two-story silhouette, straight parapet, four upper windows, and ground-floor piers. Warm off-white plaster, light stone at street level, bronze frames, transparent display glazing, and the FORM sign give the facade a coordinated retail identity. Compare the images carefully: AI preservation instructions still require visual review of opening boundaries and proportions.
Present your selected output beside the original photograph at a similar size and crop. Label the original Existing condition and the output AI renovation concept. Include the prompt and a short note naming the retained elements and proposed changes. That makes the before-and-after story specific enough for a design discussion.
The result is a visual direction to develop further, not evidence that hidden structure, dimensions, or construction details have been resolved. Use measured information and professional design review to turn the chosen facade concept into a buildable proposal.
Conclusion
A useful AI renovation starts with a clear boundary between the building you are keeping and the storefront you want to change. In ReRender AI Home, upload the existing exterior, select Nano Banana 2, choose suitable image proportions, and describe both parts of that brief. Render, compare the architecture, then refine materials, signage, glazing, and lighting in focused passes.
The aim is a modern retail identity that belongs to the original building—and a before-and-after concept that helps everyone involved make the next design decision.
Publicaciones relacionadas
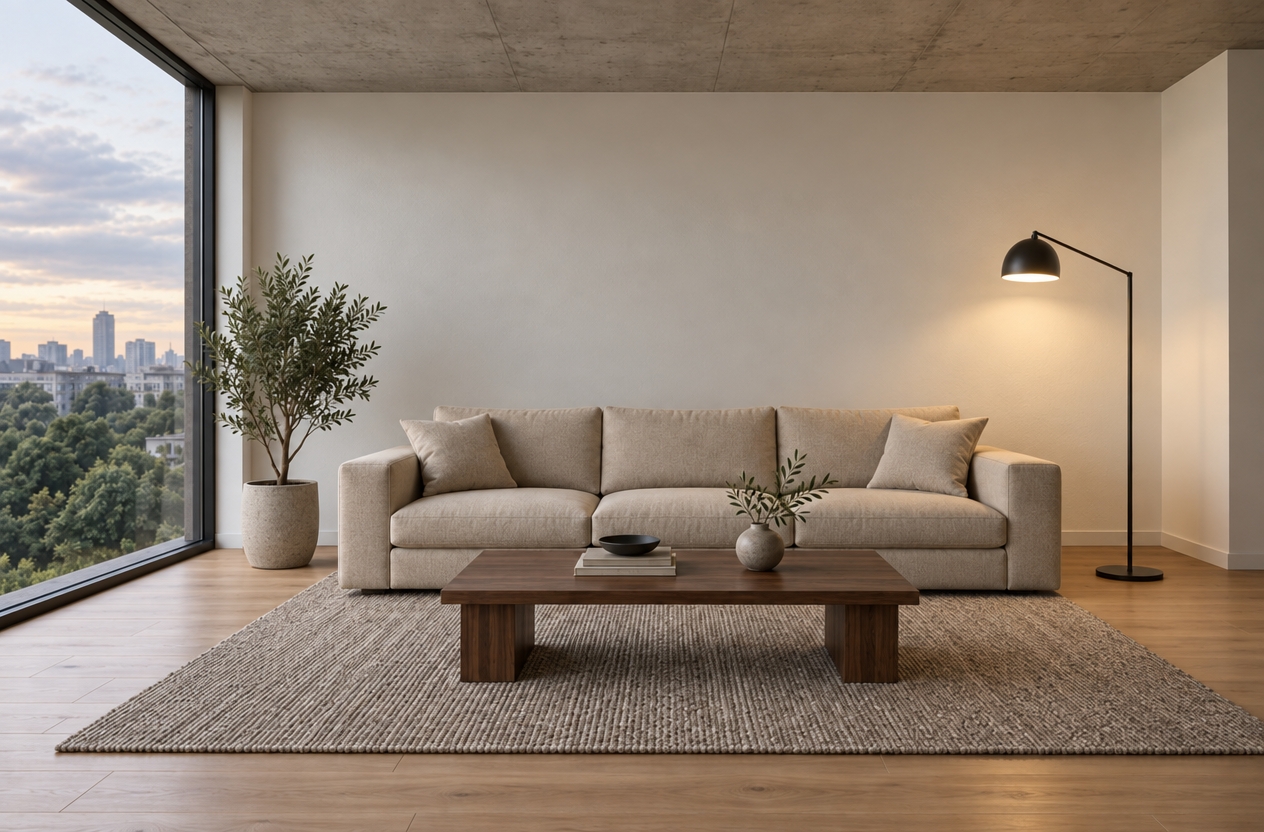
How to Relight a 3D Interior with Enhance – AI Lighting
One interior image, three painted regions: follow the updated AI Lighting workflow and inspect what changes.
ReRender Team·14 sept 2026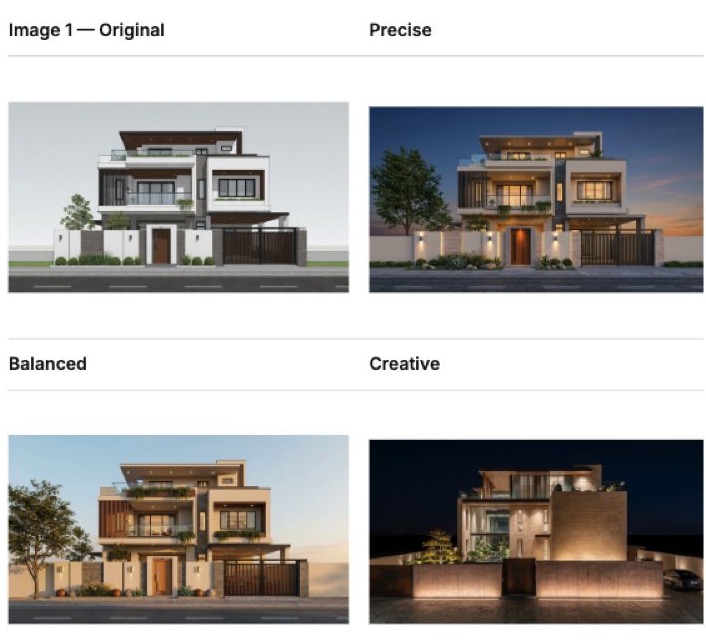
Cómo usar Renderizar: comparación de los modos Preciso, Equilibrado y Creativo
Una imagen inicial, tres modos de Renderizar. Sigue el flujo de trabajo completo y descubre cómo interpreta cada modo la misma vivienda.
Willy·8 sept 2026
Cómo convertir planos de planta en renders con personajes
Utiliza ReRender AI para generar renders interiores y exteriores a partir de planos de planta, alzados y secciones arquitectónicas, añadir figuras de personajes y convertirlos en animaciones arquitectónicas.
Willy·8 sept 2026